

Well it has been a busy few weeks here at home so my poor little blog has taken the hit!!!! Well I am back and I have missed being here.
So there I was wandering the internet and I started coming across all these fabulous Tea Caddy boxes. I knew I had to make one and then show everyone at demos how to do it so I tried some of the different sizes out there and these measurements kept popping up again and again.and the tea bags I have just fitted perfectly inside the box. I don't know who the original creator is of these boxes but whoever you are .............you are genius!!!! :)
First of all don't
panic and start thinking this is a hard project. Once you get going on
it you will be amazed how easily it comes together.
Ok, so the measurements are all in inches. Take your time, read the instructions through, ,follow the photos and you should have no problems. Don't forget to breathe between the start and the finish!!!!!!
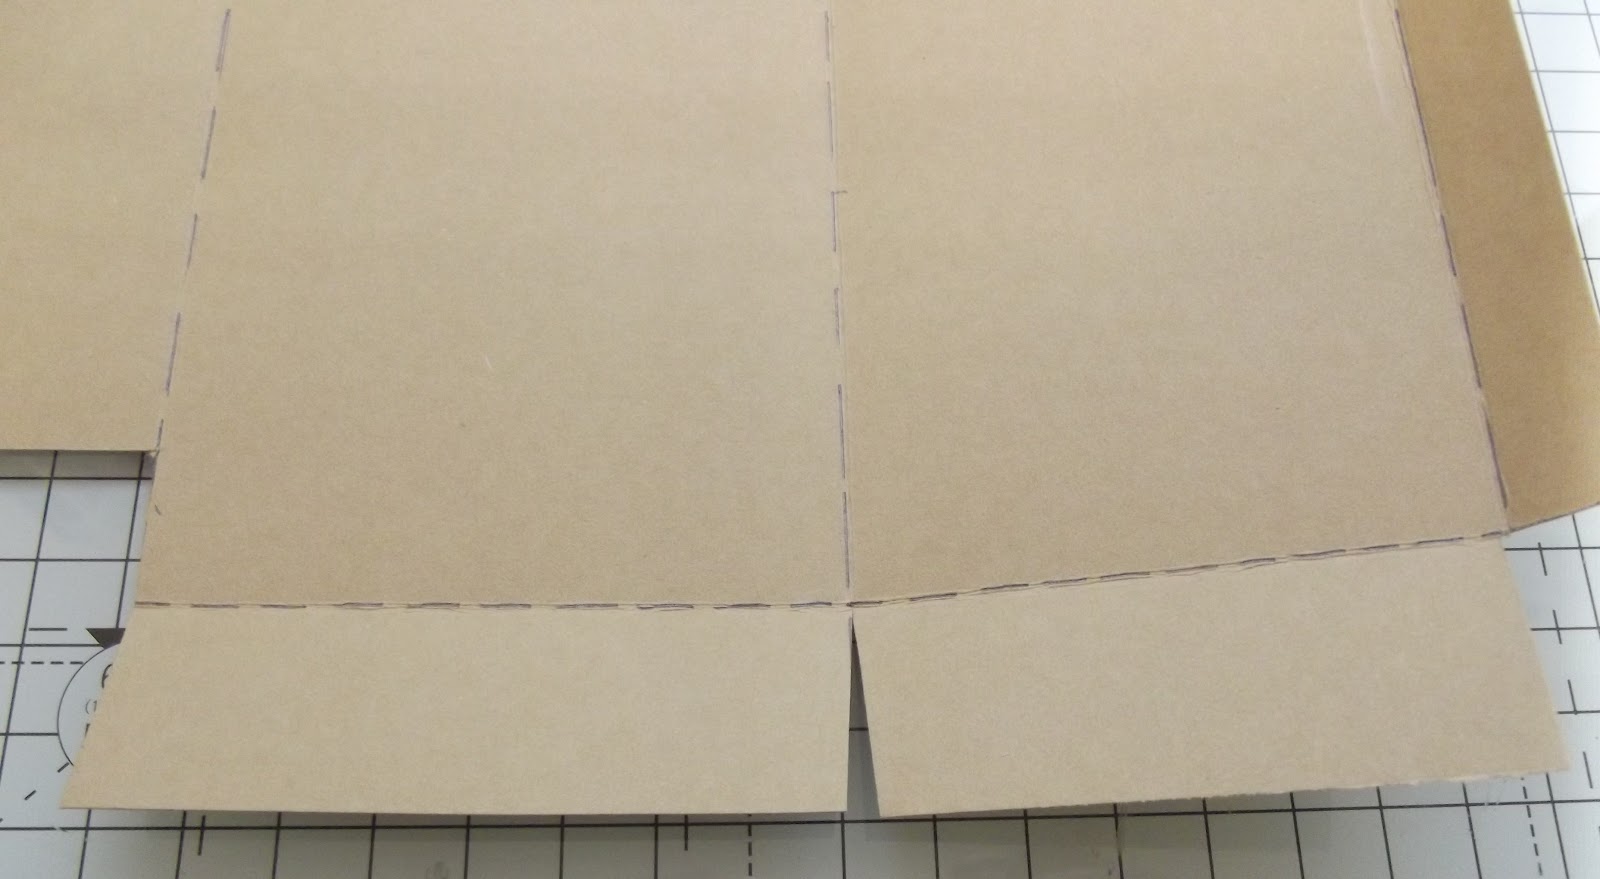
Cut
card stock to 6” x 12”
Score down
the long part of the card at 1”


Now is the time to decorate
your box before you join it together.
Place
double sided tape on the long side tab section.


That's your box basically made so pop it to the side and we will finish it off after we make the lid.
Tea Caddy Lid
Cut
a piece of card stock to 4¼ x 45/8
Score at ¾
"on all sides
Cut tabs into the lid
by cutting a straight line on the large tab side and on the small tab
side cut in at an angle.This will help the small tabs fold in neatly
when you are joining the lid together.


Cover the lid with your papers.


Base to go under the Tea Caddy.
Cut cardboard ( I used a section cut from the front cover of a pack of core card or you can use card from a cereal box or anything close to hand) to
3” x 3 3/8 . Place two pieces of double sided tape on the card.


Cut off the corner of the overhanging paper but don't cut right to the corner of the card as we don't want any corners peeking out. Leave a little gap as shown.


Decorate the outside. Pop in some tea bags and put the lid on. You are done. Now go have a cup of tea. You deserve it!!!
As you can see below I went a bit mad on making these................love em!!!!!
The first box is made using theDocrafts Enchanted Fairy paper and decoupage, the second box is made using the Oriental papers and coins that Docrafts had out a couple of years ago and the third is using the Henbury Lane papers also from Docrafts the newer Lucy Cromwell papers would work wonderfully on this project also.


Happy Crafting everyone.
HUn this is AMAZING.. Just love it, and what a fab present that could be :-) especially here in Ireland lol
ReplyDeleteWOW These are fantastic. I love them all and they would indeed make fabulous presents. Thank you for sharing.
ReplyDeleteHugs
Linda xxx
this is FANTASTIC! now i can put my teabags onthe side and not hide them in the cupboard, thanks so much xx
ReplyDeleteStunning and fabulous tutorial! Elaine-xxx-
ReplyDeleteOh Wow love this....thanks for the tutorial as well.xxx
ReplyDeleteoh my goodness what a super little tea caddy ... love the design and oh you make it look soooo easy ... thank you for sharing it with us ... happy crafting and love sandy xx
ReplyDeletewonderful, thanks for sharing, i have a few friends already in mind to make these for!!
ReplyDeleteWOW! These are all fabulous! xx
ReplyDeleteWow what a great idea , all your tea caddy,s are beautiful, Thank you Cliona for sharing will have to have a go xxxxx
ReplyDeleteA great tutorial - thanks.
ReplyDeleteYou have been busy! Love them all!
Kate
xx
what a great project - i think i will have to add this to my long list of 'projects i'll have to try'. my mil loves her fancy teas so maybe this can be part of her xmas pressie!!!
ReplyDeletekathleen mc xx
wow! These are wonderful. I love the design and the way you have decorated each one. Thank you for lovely clear instructions
ReplyDeleteSue
A fantastic project, and your finished caddies are gorgeous, thank you for sharing the instructions
ReplyDeletefantastic tut
ReplyDeletetfs
hugs linda xxx
just made one of these it was a little fiddly but managed it ended up with 2 lids (the first didn't fit)
ReplyDeletethanks for sharing XX
Wow I am just speechless it is absolutely stunning and the tutorial is great xx
ReplyDeletewow this is stunning thank u for sharing the tutorial
ReplyDeletelinda x
Hiya Cliona,
ReplyDeleteReally fab tea caddy, but can you tell me where you buy the wrapped tea bags from ??
hugs Diane xx
Hi Diane,
DeleteYou can buy the Tea Bags in Lidl or Aldi or you can get great flavored tea ....lemon etc in any grocery shop (Tesco for me) or a lot of Health Food Shops would have them as well.
Ta for that Cliona !!
DeleteWhat a lovely gift these would make, your tutorial is brilliant, thanks for sharing x
ReplyDeleteFantastic papercraft creations. Such a fab way of making a small gift for somebody or to use in your own home.
ReplyDeleteFab tut, thanks for sharing
ReplyDeleteThanks for sharing these are really useful. Tinaxx
ReplyDeleteGreat Tutorial! Great Gift Idea!
ReplyDeleteHugs
Dawn xxx
Wow these are amazing! Thanks for the tutorial xxx
ReplyDeletewow this is great thank you for shearing and tutorial xxx nicky xx
ReplyDeleteWhat a fabulously fun project and great tutorial. TFS xx
ReplyDeleteWow Cliona - thanks so much for sharing!!!!!
ReplyDeleteWhat a lovely idea and not just for tea bags x
ReplyDeleteFabulous creation.. Thanks for taking time to do this fantastic tutorial... simply Brillant!! Hugs May x x x
ReplyDeleteHey,
ReplyDeleteAnother gorgeous and useful tutorial from you...thanks so much for sharing..
Its a great idea and you have exexuted it beautifully...
Just visiting your blog for the first time, thanks for sharing the tutorial for this tea caddy, I've seen them around but not the instructions. They'd make great gifts. I'll be back to visit again soon. Helen (Sydney)
ReplyDeleteWonderful tutorial, will have a go soon. I'm a beginner at making boxes etc, but instructions look good. Thankyou, Jean.
ReplyDeleteI love these tea caddy boxes. Great for making as a gift set - ooh... could make one with a box of little jams etc..... that's my mother in law sorted for her birthday then!
ReplyDeleteGreat tutorial... xxx
great tut thank you x
ReplyDeleteBrilliant tutorial. A lovely idea and you could use it for face pads also:-)
ReplyDeleteHi Cliona
ReplyDeleteEnjoyed demo today loved the tea caddy cant wait too have a go Mary x
wow... lovely project n thanks for d tutorial :-)
ReplyDelete